In short
- Position your setup perpendicular to a window with indirect daylight for soft, realistic lighting.
- Use two inexpensive white foam boards to create a seamless backdrop and eliminate dark shadows.
- Leave extra spacing around your item during shooting to prevent awkward thumbnail cropping on Etsy.
- Avoid stylized filters during editing to ensure your image colors accurately match the physical product.
On this page
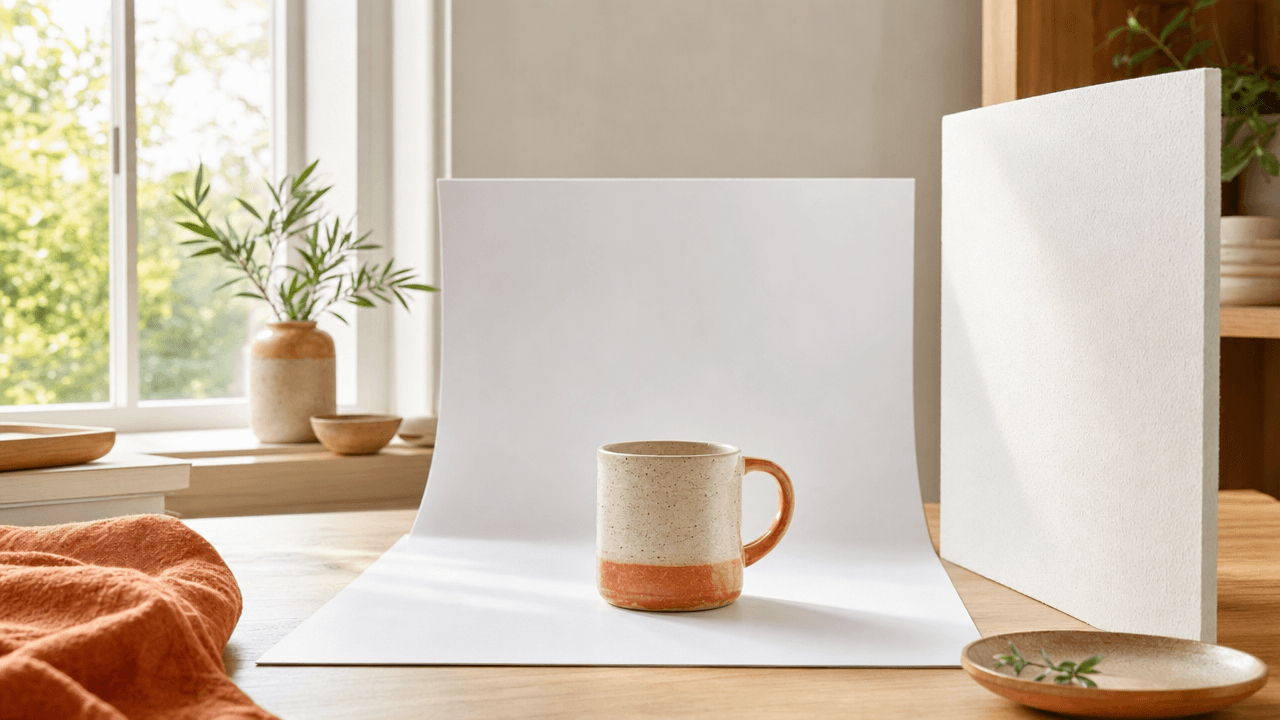
Taking high-quality Etsy product photos at home requires a window with indirect sunlight, simple foam board bounce cards, and a clean backdrop rather than an expensive lighting studio.
Getting clear images that show accurate colors and textures is essential for building buyer trust. You can set up a low-cost home shoot space in under twenty minutes using items you already own.
Set Up a Natural Light Photography Station
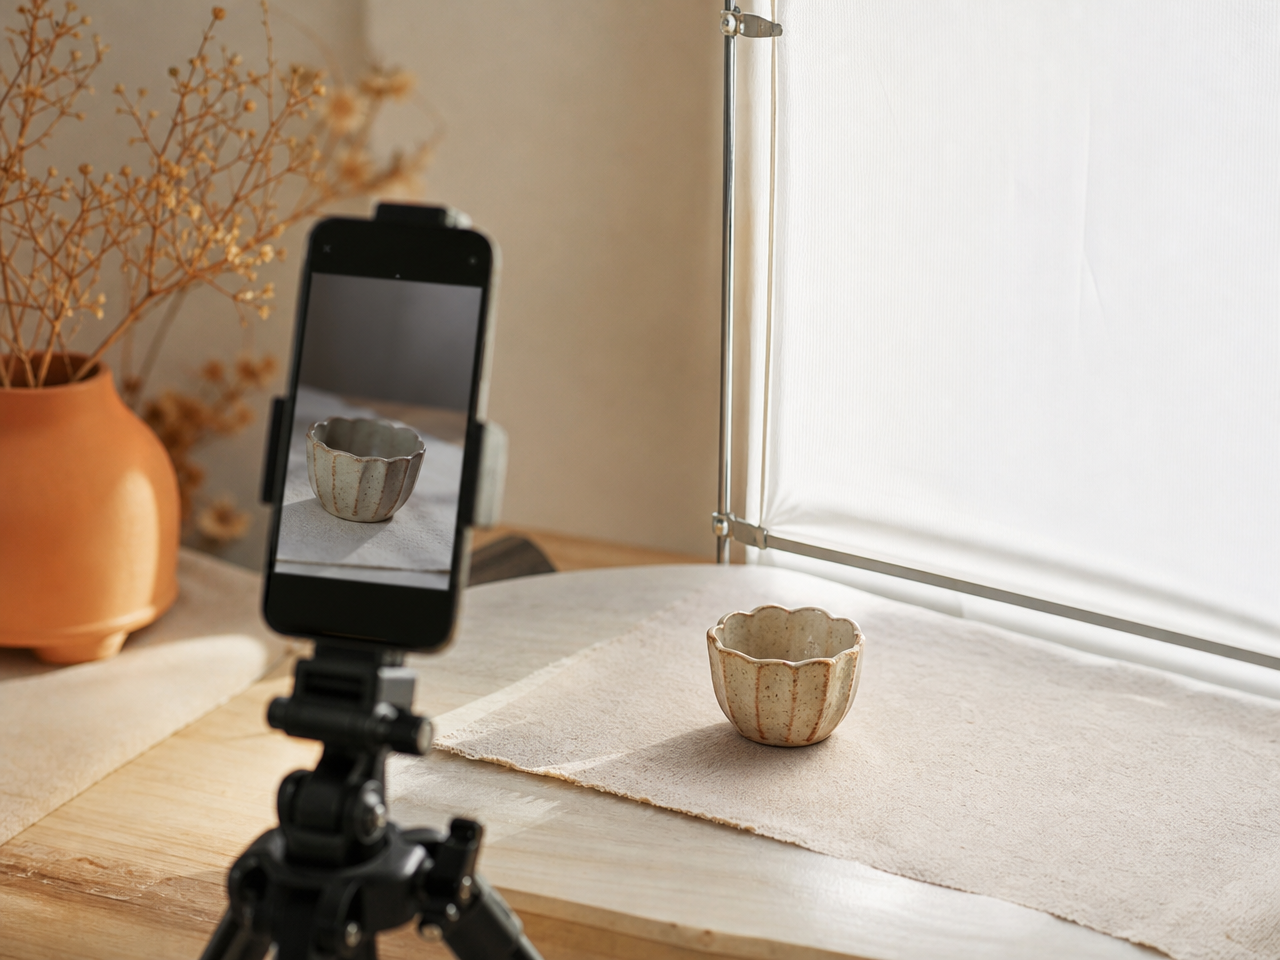
Set up your photography table perpendicular to a large window so light washes across your product from the side. Never point direct sunlight at your item. Hang a sheer white curtain over the glass to soften harsh rays, eliminate dark shadows, and keep highlight details sharp across your main product photos.
Balancing the Light Drop-Off
Side-lighting creates natural depth, but the side facing away from the window can turn dark. Place a sheet of white foam board directly opposite your window to bounce light back onto the shadowed side of the product.
Direct glare or blown highlights: Move your table two feet back from the window frame.
Yellow or blue color cast: Turn off all overhead room lights so indoor bulbs do not contaminate natural daylight.
Harsh shadow lines: Angle a white poster board toward the shaded side until hidden details pop.
Setting a consistent window rig saves hours during batch shooting sessions and simplifies choosing your main listing photo when reviewing your raw shots.
Build DIY Backdrops and Reflectors on a Budget
Build a professional shooting space using two white foam boards from a craft store. Place one board horizontally under your product to act as a clean, seamless base. Set the second board vertically directly opposite your window light source to bounce soft daylight back onto the shadowed side of your item.
This simple two-board setup acts as a natural fill light, eliminating harsh dark shadows without forcing you to buy expensive studio equipment or worry about matching color temperatures from artificial bulbs. If you sell flat-lay goods like stickers or stationery, flat boards work instantly. For three-dimensional items, leaning your vertical board against a wall creates a crisp, distraction-free sweep.
Positioning Your Bounce Board
Window Light on Left: Place the vertical foam board on the right side of the product, angled slightly toward the camera.
Dark Products: Move the bounce card closer—roughly six to twelve inches from your item—to open up hidden texture.
Digital Items: Skip physical staging entirely by creating digital product mockups to show your designs on realistic background templates.
Keep your setup static so your product photos maintain consistent lighting across your entire storefront, giving your shop a polished, cohesive brand look.
Frame Images for Etsy Mobile Thumbnail Cropping
To stop mobile search results from clipping your item, frame every primary photo with at least 25% empty border space around your product. Etsy re-crops your primary photo into different aspect ratios across mobile apps, tablet layouts, and desktop search grids, cutting off tight edges.
Shooting too close to your item is the fastest way to ruin a thumbnail. When a buyer scrolls on the Etsy app, a photo shot edge-to-edge will crop off essential features—like the handles of a tote bag or the rim of a ceramic bowl. Instead, pull your camera back, center your product, and let your background extend past all four sides.
The Mobile Framing Checklist
Shoot horizontal or square original files: Avoid vertical framing for your hero image so Etsy does not force an awkward center-zoom.
Keep focal details in the middle third: Place key accents, textures, or focal points dead-center so auto-cropping leaves them untouched.
Preview your crop before publishing: Check your listing thumbnail in your shop manager preview to verify no edges are trimmed off on smaller screens.
Edit Product Photos on Mobile Without Distortion
To edit mobile product photos without color distortion, use your phone's native photo editor or free apps like Lightroom Mobile to adjust exposure and white balance manually. Avoid preset artistic filters completely. Your main objective is absolute color accuracy, as color discrepancies between physical items and listing photos frequently cause buyer complaints and return requests.
The Three-Step True-to-Life Edit
Fix Exposure first: Increase brightness until background whites look crisp, but stop before light edges on the product wash out.
Correct White Balance: Adjust the warmth slider until whites in the photo look neutral. Slide cool if indoor lighting turned your shot yellow, or warm if outdoor shade made it blue.
Check Saturation against reality: Never boost vibrancy or apply filters. Keep saturation untouched so fabric, wood tone, or paint shades remain exact.
Decision Rule: Hold your physical product next to your phone screen in neutral daytime light. If the photo's hue looks even slightly shifted compared to the item in your hand, reset your adjustments. True-to-life rendering prevents item-not-as-described cases and keeps your shop rating high.
Frequently Asked Questions
Can I use a smartphone for Etsy product photos at home?
Yes, modern smartphone cameras capture sufficient detail and resolution for Etsy listing images when paired with strong natural daylight. Always turn off flash, lock focus on your item, and use basic editing software to adjust contrast, exposure, and white balance instead of purchasing expensive DSLR camera equipment for your shop.
What is the best background for home product photography?
A plain white foam board or neutral poster paper works best because it reflects light cleanly without distorting item colors. Neutral, non-distracting surfaces keep the buyer focused entirely on product details, which aligns with standard Etsy listing visual guidelines and helps prevent unexpected return issues caused by color mismatch.
How do I avoid harsh shadows in product photos?
Position your photoshoot station next to a large window with indirect daylight, using a white sheet or sheer curtain to diffuse direct sun. Place a white foam board opposite the window to reflect light back onto the shadowed side of your product, balancing brightness naturally across the entire image frame.
References
Is your listing ready for search?
Paste your title and tags; it flags duplicates, tags over 20 characters and empty tag slots.
Open the Listing CheckerNo sign-up needed
Emirhan Sevim
Co-founder of Optimsy. Builds tools that help Etsy sellers make listing, pricing and niche decisions with data.
About Optimsy →